
Rambox is a workspace organizer that allows you to unify all the applications you want in one place. It is perfect for those who care about productivity while working with many business and personal applications.
Although Rambox has a potent and easy-to-use interface, we will show you how to set up the application step by step. If you have any questions about using Rambox or any of its features, keep reading.
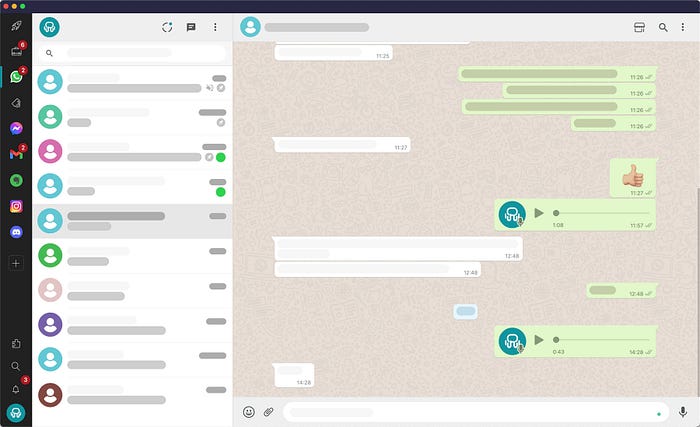
Rambox download
To start working with Rambox and increase your productivity at work, the first thing to do is to install it on your computer. It’s effortless. Rambox works on Windows, Linux, and Mac.
For Windows, the application will be downloaded as an EXE file. EXE files are executable files known to be used in Windows. One of the main advantages of this type of file is that it does not need a program to be opened because Windows knows how to handle it. When opening an EXE file, we must consider that some of them are self-extracting, i.e., when they are started, the system automatically extracts their contents to a specific location. In any case, to run an EXE file is as simple as clicking on it or right-clicking to open the drop-down menu and selecting “Open.”
As for Mac, it uses the DMG file format. The files in this format are container folders where you will find the programs you want to install on your computer. To open this type of file, you have to click on it to create a new drive where you will find all its contents. Then, you only have to access the unit in question and run the file to install or run it.
Finally, GNU/Linux distributions have a package management system that allows you to install applications, commonly known as packages in Linux. The easiest method to install an app on Linux is to use the application store of each Linux distribution. There are many packages, but we would like to highlight two: AppImage and Snap.
AppImage does not require installation or administrator permissions to work. It offers portable applications packaged in a single file with all its dependencies. When using a .appimage file, you only need to grant it execution permissions, which will automatically mount in the user space file system.
Snap’s goal is to achieve a single software distribution format that can be used on desktop PCs and IoT devices. Each Snap packages all the dependencies of the software in question inside it and, unlike AppImage, snaps support updates without deleting and replacing the initial package.
Rambox Plans
Rambox offers three different types of plans, each oriented to meet different needs. You can find the following plans:
· Basic. In the immediate and free Rambox plan, you will find the following features and functionalities: Real-time synchronization, notification management, quick search, application lock, application hibernation, theme customization, focus mode, mute sounds, custom applications, text search, shortcuts, disable workspaces and applications, application manager and general proxy.
· Pro. The Pro Plan, in addition to all the features of the basic plan, also includes customizable workspaces, spell checker, extensions, session management, per-application proxy, JavaScript and CSS injection, mobile view, custom user agent, and premium support.
· Enterprise. Finally, this plan includes the following features and functionalities: Team management, custom branding, pre-installed workspace, Active Directory/SAML IdP, centralized billing, and priority support.
Download the version of Rambox that best suits your needs and log in with the account of your choice.
Rambox configuration
Once you have the Rambox application installed on your computer, the next step is to configure it to your liking. First, we recommend you start by configuring the Rambox settings:
To do this, click on your profile icon (bottom left) and select Settings.
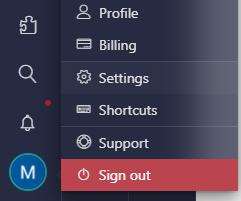
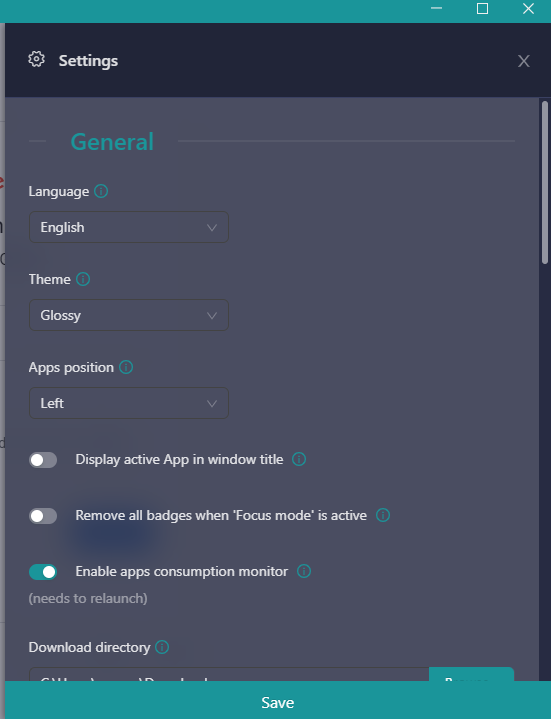
In this section, you can change the language, the interface theme, the positions of the applications, and their view. In addition, you can configure the startup and windows behavior, security, proxy, and compatibility.
As a second step, we recommend that you look at, enable or disable and learn the shortcuts offered by the application. You can find them by clicking on your profile and selecting “Shortcuts”. Among them, you can find:
· Back to the previous app
Windows/Linux: Alt+Backspace
Mac: two times Cmd or ALT + Backspace
· Navigate with arrows
Windows/Linux:: Alt+Shift+Arrows
Mac: Cmd + ALT + Arrows
· Go to the Specific tab
Windows/Linux: CTRL + (1 to 0)
Mac: Cmd + (1 to 0)
· Switch Tabs
Windows/Linux: CTRL + TAB, CTRL + SHIFT + TAB
Mac: Cmd + TAB, Cmd + SHIFT + TAB
· Back/Forward in apps
Windows/Linux: ALT + Left / ALT + Right
Mac: CMD + Left / CMD+ Right
· Quick search
Windows/Linux: ALT + SHIFT + K
Mac: Cmd + ALT + K
· Lock Rambox
Windows/Linux: ALT + SHIFT + L
Mac: Cmd + ALT + L
· Search
Windows/Linux: ALT + SHIFT + F
Mac: Cmd + ALT + F
· Support
Windows/Linux: F1
Mac: F1
· Settings
Windows/Linux: ALT + SHIFT + S
Mac: ALT + S
· Profile
Windows/Linux: ALT + SHIFT + P
Mac: ALT + P
· Focus Mode
Windows/Linux: ALT + SHIFT + D
Mac: Cmd + D
· Zoom entire Rambox
Windows/Linux: CTRL + SHIFT + -/+
Mac: Cmd + SHIFT + -/+
· Zoom only in the current app
Windows/Linux: CTRL + -/+
Mac: Cmd + -/
Application Settings
Rambox applications are all grouped on your screen’s right or left side, depending on how you have configured their layout. To add all the applications you want to your toolbar, you must click on the + add an app or workspace symbol.

In this tab, you will be able to add more than 700 applications to your toolbar, increasing your efficiency and productivity in your daily life.
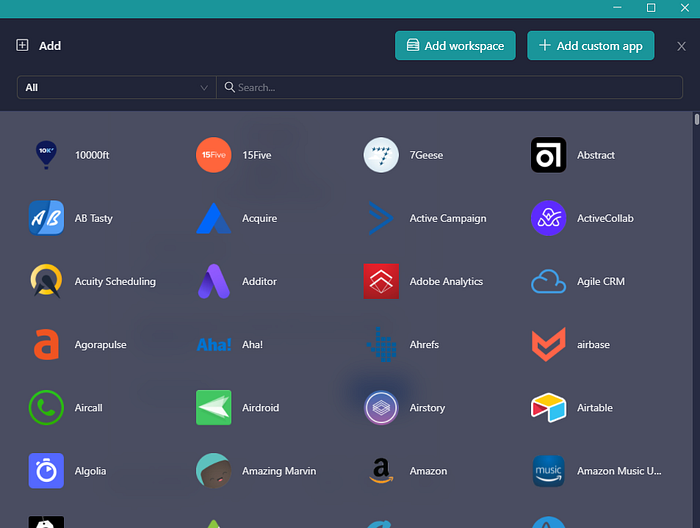
If the application you are looking for does not appear in the list, you can add it from the +Add custom app button. Enter the URL of the website or application you want to add and click +Add to add it to your menu.

If you want to add a new workspace, click the +Add workspace button and configure it to your liking. Please give it a name, and enter the times you want to work to receive specific notifications of the applications you configure in it and its layout.
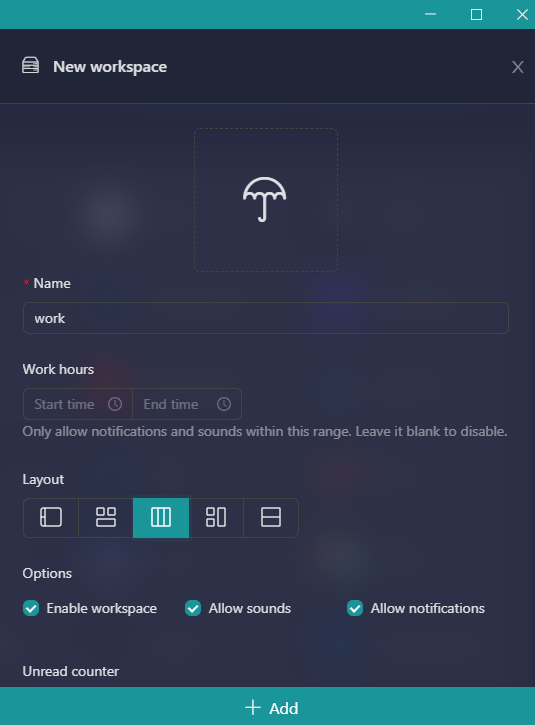
One of the main advantages of working with different workspaces is that you can configure them so that each workspace works with other credentials. For example, if you need to have two different email sessions, you can create two independent workspaces, each with a different email address. This will prevent you from starting several sessions in Google or using other browsers for each login.
In the different applications of each workspace, you will be able to choose whether to log in by yourself with the credentials you want or inherit the workspace credentials with the “inherit from workspace” choice.
If you choose the option “inherit from workspace”, for example, if you create a workspace with your company email and work with social networks, the applications you add to the workspace will log in with the company email. When you create another workspace with your personal or client email, the social networks you add will log in with that email.

This way, you can work in a simple and organized manner with different accounts and login into the same place. Forget about having multiple tabs open in the same browser or using various browsers. This can create confusion, decrease your productivity and lead to errors. With Rambox workspaces, you work in an orderly, efficient and productive way.
All applications can be configured individually. You will be able to choose which applications you keep active, whether or not you want to receive notifications from the application and if you want to activate them with or without sound.
To configure these settings, right-click on the application icon in the toolbar.
In addition, if you are a user with computer and programming skills, you can also access the advanced settings with the developer tools.

Extensions
Rambox allows you to enable different extensions in each application in a straightforward way. Extensions work per session. That means if you have two applications with the same login or profile and add an extension to one of them, both will have the extensions you have configured in the first place.
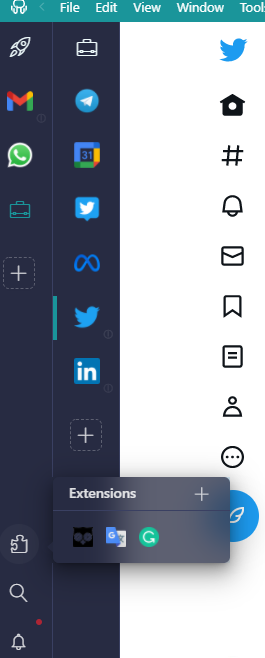
To enable them, you will have to open the application in which you want to include extensions and click on the Extensions button in the main menu.

Here is a simple example. Let’s configure extensions for the Twitter application. Rambox offers a multitude of extensions for different applications. In the case of this social network, you can include the dark mode of the theme, Dashlane, Grammarly, UBlock, or Google Translate. The only thing you have to do to enable the extensions is to click on the button of those you want to include.
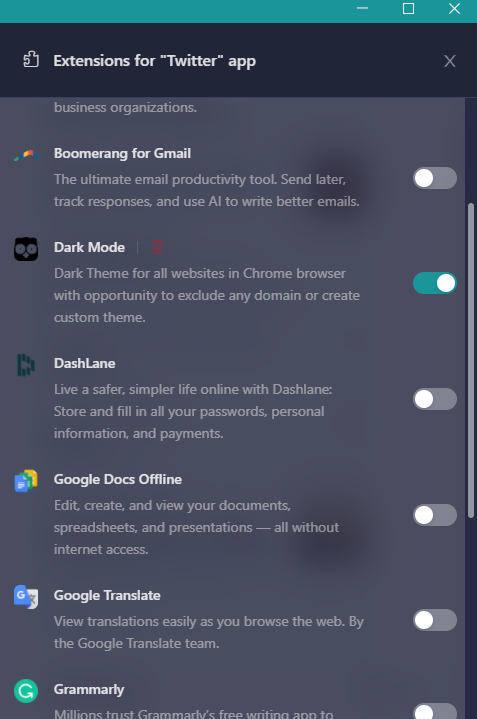
Once included, you will see a notification at the top of the application that the extensions have been modified. Click on reload to enable them. Also, when you have the app open in Rambox and click on the extension’s icon, you can quickly and visually see which extensions you have enabled at that moment.
Notification Center and Focus Mode
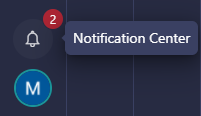
From the Rambox notification center, you can preview all the emails or messages of those applications where you have configured notifications to be enabled. You will find the notification center in your toolbar.
Also, in Rambox, we know how important concentration is and how difficult it is to lose it when sound and message notifications keep bursting on your screen. That’s why we have created the perfect solution to avoid distractions and improve your productivity and efficiency when performing a task: the Focus Mode.
With this mode, you can choose whether to disable notifications indefinitely or set a manual time so that nothing disturbs you while you finish your task. You can enable Focus Mode by clicking on the notification center.

That’s it! Now, you have all the keys to configure Rambox in the way that suits you best to increase your productivity and efficiency. As you have seen, Rambox has a simple interface and looks fantastic. The last tip we can give you is to enjoy keeping everything organized in one place.
If you are overwhelmed by the number of applications you have to work with, and can’t optimize your time and resources, try Rambox for free. All you have to do is download the program, configure it to your liking and start enjoying its functionalities. No cards, no cheating, it’s that simple!
